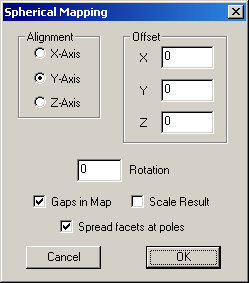
Spherical Mapping
Applies spherical mapping the the current selection, or to the entire model if there is no selection active.

Summary
Alignment
Offset
Rotation
Gaps in Map
Scale Result
Spread facets at poles
Description
Alignment
Determines the orientation of the sphere's major axis (it's top
and bottom.)
Offset
These settings allow repositioning of the model with respect to
the mapping sphere. This is sometimes necessary when mapping models that
aren't symmetrical. For example, suppose you want to spherically map a
model that consists of a quarter sphere. By default, the mapping sphere
will be centered on the model's geometry and would give
undesired results in this case. To correct this, you can enter an offset
here to adjust the center of the mapping sphere to get the desired
results.
Rotation
Changes the position of the seam of the mapping sphere.
It is specified in degrees, and is clockwise about the negative axis (see
"Axes Alignment" above.)
Gaps in Map
Selecting this option will cause a border of blank space to be
placed around the entire mapping area. It's a good idea to leave this
option checked since each 3D rendering program can interpret UV coordinates
slightly differently and it's a good idea to paint over the edges of a
map by a few pixels. This isn't possible without gaps in the
map.
Scale Result
Checking "Scale Result" will cause the resulting map to be scaled
based on the "Pixels Per Unit" setting under
Preferences.
Spread facets at polesUnchecking this will cause all facets
that share a vertex at the top or bottom of the cylinder to also share one UV
coordinate as well. This is usually undesirable and is not recommended.
