| Using UVMapper Classic for Windows | |
|
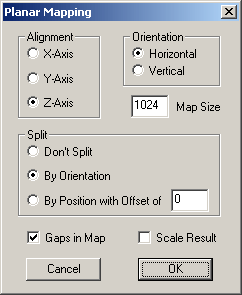
The first thing you need to do is download UVMapper Classic for Windows here. The model I am using in this tutorial is the nude female from Poser 3. Start Poser, select "Figures->People" and double click on the Nude Woman. Do not check "Keep current proportions" and click ok. Since we want a good reference pose we will use the default. Select "File->Export->Wavefront OBJ..." to create the obj we'll be remapping. Select "Single Frame" and "Export object groups for each body part". Okay, now we're ready to begin. Start UVMapper Classic and maximize the window. Load the model we just created. You will see the default texture map that was created by Zygote, the group that created the model originally. We're going to ignore that and create ours from scratch. Select "Edit->New UV Map->Planar". Initially, we'll use the settings shown on the dialog box to the left. |
|
|
|
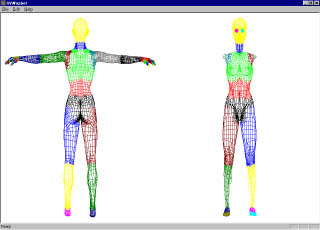
Then select "Edit->Settings", click on "Color by Group" and click on ok. Your screen should now look like this. |
|
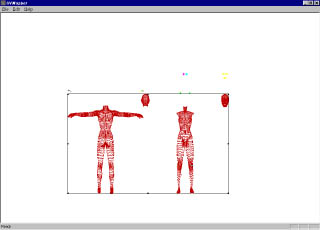
First off, select "Edit->Select All" and press the numeric keypad '/' key to shrink the selection to 25%, half of x and half of y (the numeric keypad '*' will do the inverse.) Press Enter to save your adjustment. A note here, if you didn't like the adjustments you just made, press Esc to undo your changes since making your last selection or remapping. Now we're going to isolate the face, remap it, and set it aside for later. Select "Edit->Select by Group", click on "head:2" and then click ok. Use shift+right-arrow about four times to move the head to the right. Next select "Edit->Select by Material", click on "skin" and click ok. Use shift+down-arrow to move your selection down. Your screen should now look like this. |
|
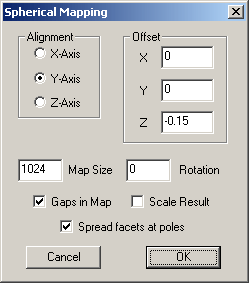 |
Press Enter to save your changes. Now left click the mouse and drag over the face on the right to select it. Be careful not to select any polygons other than those on the face. Press '= ' to maximize your selection and select "Edit->New UV Map->Spherical". Use the settings shown on the dialog box to the left. |
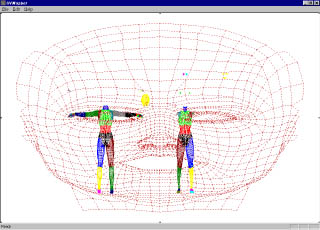 |
Your screen should now look like this. |
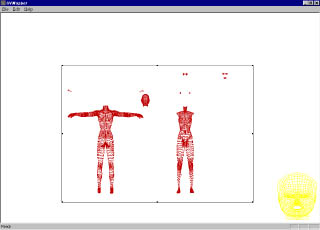 |
Press numeric keypad '/' a few times to shrink the selection and use your mouse to click
on the selection and drag it to the lower right corner, out of the way for now. Note: you can also use PgDn to place it there,
all the direction keys work for moving the selection around the screen. Now left-click and drag to select everything except the
pace in the corner.Your screen should look like this.
|
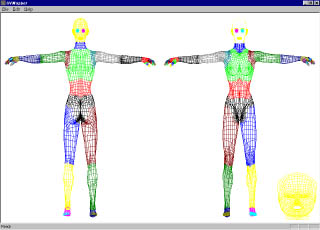 |
Okay, press = to maximize your selection. Select "Edit->New UV Map->Planar" and use the same settings as last time (the dialog will remember them) except select "Split by orientation" and click ok. Press Enter and your screen should look like this. |
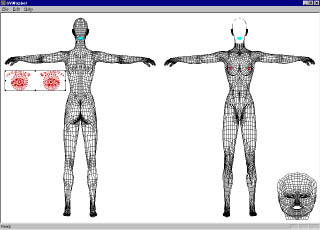 |
Select "Edit->Settings", choose "Color by Material" and click ok. Select "Edit->Select By Material". Now we're going to do a multiple selection. Single click on eyeBall. Now, while holding down the Ctrl key, also click on eyeBrows, iris, lashes and pupils. Holding Ctrl allows you to toggle the selection of any item. You can also click and drag to toggle more than one item at a time. Holding Shift allows you to select all between your first and second selection. Click ok. Press = to maximize. Select "Edit->New UV Map->Planar". Select "Don't Split" and click ok. Resize the selection by using the keypad keys /, *, + and - or just grab a handle on the selection with your mouse and drag it to resize. I've chosen to move the selection to the left, like so. |
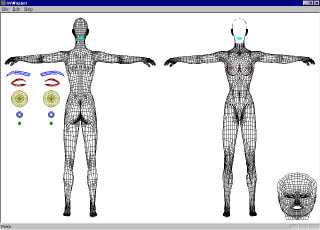 |
Now, select each material (eyeBall, iris, lashes and pupils) one at a time and move the selections down like so. |
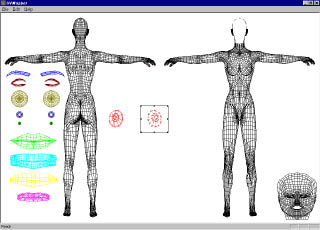 |
Perform the same procedure with the mouth. Use "Select by Material" on the following items "innerMouth, lips, teeth and tongue". I've placed them below the eye maps. Finally use "Select by Material" to select "nipples" and resize them. Once they're resized, I used the mouse to select one and move it closer to the other so that it wouldn't take up so much room on the map. |
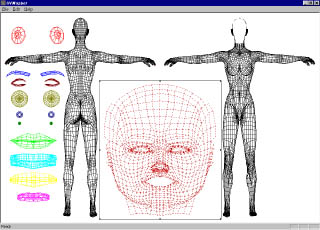 |
I then relocated them to the upper left corner. Now use the mouse to reselect the face in the lower right corner. Press * to enlarge it, adjust the proportions and place it in the center of the map. Something like this. |
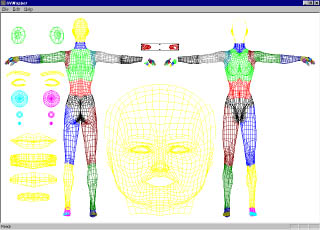 |
Now we want to remap the hands. Select "Edit->Settings", choose "Color by Group" and click ok. You can select the hands by using "Select by Group" and clicking on every part that makes up the hands, but here's an easier way - select only "lHand:2" and move it up (be sure that you can isolate it again by dragging the mouse over it.) |
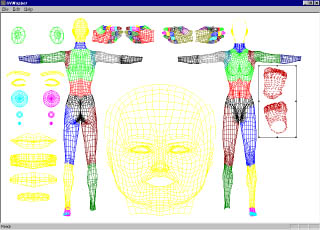 |
Now use the mouse to select the remaining fingers. Be very careful not to select any polygons other that those of the fingers. If you see that you've made a mistake after moving your selection, press Esc and try it again. Drop the fingers anywhere on top of the hands. Press Enter to leave them there and use the mouse to reselect the hands along with the fingers. Select "Edit->New UV Map->Planar", choose Y-axis alignment this time so that we're "looking down" on them, choose "Split by Orientation" and click ok. Resize them and place the in the top center of the map. Now select "Choose by Group" and select "lFoot:2" and "lToe:2". Remap them using the same settings that we used for the hands. Resize them and place them on the right side of the map. |
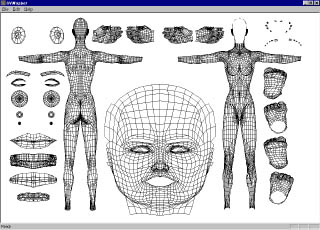 |
Remap both feet, and remap the fingernails and toenails in the same way that we remapped the hands and feet. After selecting "Edit->Settings" and choosing "Black and White" your texture map should look something like this. |
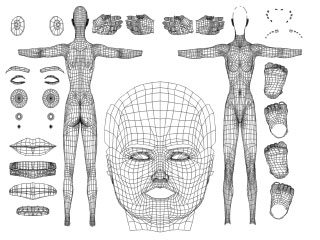 |
Now save out your new obj. I recommend changing the name and not overwriting your original model. Then save out your new texture map. remember that it's still a 256 color image and probably needs to be converted to 24 bit in a paint program. I expect to have 24 bit texture map saves as an option in the future. Just be sure that you use the new model with your new texture map. The new texture map will not work with the old model. A couple of things you can do with this - suppose you want to place a tattoo on Posette. You can use the mouse to select a few polygons from where you want to place it, and resize them much larger for detail. You don't have to be constrained by groups or materials, you now have the ability to grab any polygons you want and remap them any way that fits your need. Also, if you want an ankle tattoo, you can select those polygons, remap them cylindrically and you'll have a nice flat map of her ankle to draw on. The possibilities are endless! If you have any questions or comments, please feel free to contact me. |
