| Spreading facets | |
|
|
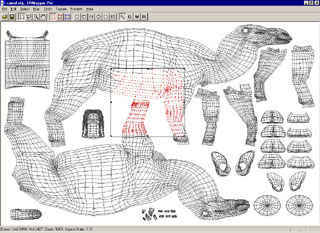
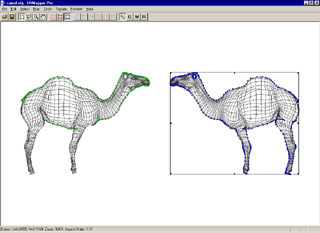
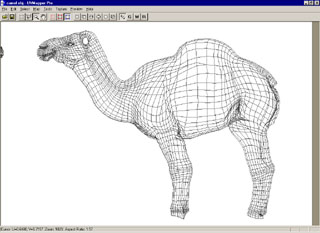
The first, and most important thing that needs to be done to use the facet spreading feature in UVMapper Pro is to split the model into two halves with pretty much a straight line dividing them. Start by loading the DAZ3D camel. Since the camel has already been divided up nicely for us, we'll take advantage of this and grab only the two sides we're interested in. Normally you will need to perform this step yourself (I find the "select by geometry" very useful for this.) Select a few facets from the two sides we're interested in like so. Pressing the '7' key will select all facets connected by UV coordinates. Then press '\' to hide the selection, enter to save your changes and '\' again to swap pages. Press control+a to select all facets on this page and remap them using planar, Y-axis, don't split. |
|
|
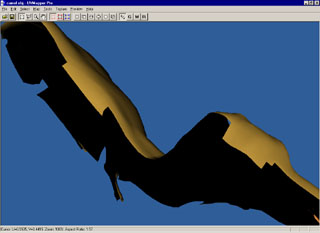
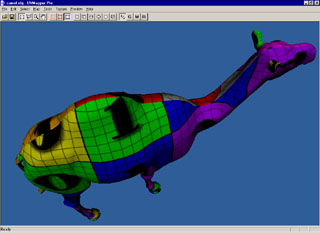
Use the rectangular select tool to select half of the camel. You can add to the selection by pressing and holding the shift key while left clicking and dragging. Likewise, you can remove facets from the current selection by using the alt key. Pressing tab will switch between the texture map view and the 3D preview so you can check your work. See the uneven edge along the top of the head and the top of the back? This is what you're trying to avoid. |
|
|
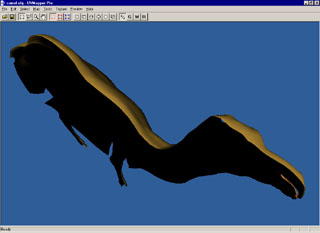
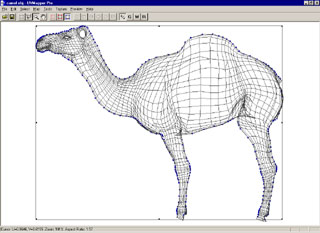
By holding down the alt key, I was able to remove the offending facets and now have a nice, clean edge. I'm now ready for the next step. |
|
|
Next, I rotate the model 90 degrees around the Y-axis using the Map->Rotate Model feature with the settings X:0,Y:90,Z:0. I then do a planar map along the Z-axis (don't split) and adjust the result for the screen (I also use control+x to flip the right side.) I then press enter, select the other half of the camel and repeat this process. |
|
|
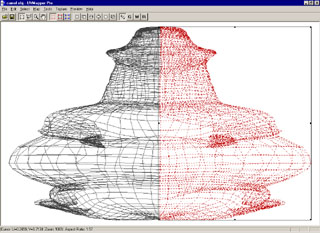
Okay, now we're ready to spread some facets. Click on the "select by edge" button on the toolbar, right click on one of the sides and choose "select UV set". The blue squares are the selected vertices along the edge, and the green squares are the UVs that share the same geometry as the current selection. We now need to remove some of the selected vertices to get good results. Any vertices that would overlap if spread (the inside of the mouth) or are on sharp angles (the edges of the feet) should be deselected. The spread facets feature can be set to drag along any given number of vertices in the User Preferences dialog box (more on this later.) |
|
|
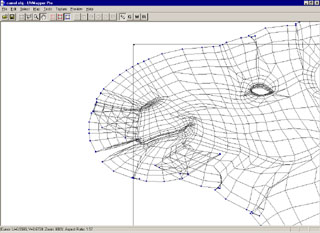
Using the zoom tool, I move in on the feet and deselect all the vertices along the bottom (by holding down the alt key and dragging over them.) I also deselect the vertices around the ear, in the mouth, on the angle between the legs and the stomach, and around the tail. Okay, it's a little hard to make out but here's the result of my work. |
|
|
You're now ready to start spreading facets. Start by setting the preferences in the user settings (open the dialog by pressing control+k.) I've been using the settings linear, estimate by UV positions, and a drag depth of 5. Press ok, and you can use these settings by pressing the keypad + and - keys. If you start to spread the facets and notice an area that's going in the wrong direction, you can back up, zoom in to deselect it and try again without having to redo the previous step. Here's an example - I missed two areas, one under the chin and the other on the nose, that were causing a problem. |
|
|
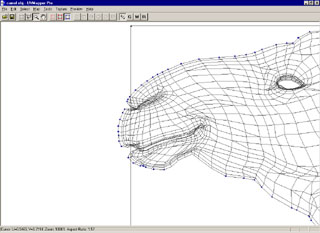
I've backed up, deselected the vertices causing the problems and tried again. A little less exaggerated, here's the result. Remember that you don't need to select every vertex along the edge to have it move. The drag depth setting determines how many vertices deep the drag function will move. For example, if the drag depth is set to 5, all vertices that are 4 line segments from a selected vertex will be moved. How far it moves depends on the decrease-in-movement setting. Selecting linear with a drag depth of 5 means the second set moves 4/5th as far as those selected, the third moves 3/5th etc. The exponential setting decreases more rapidly. |
|
|
Here's a wider view of my results. Repeat this procedure for the other side. You'll probably need to do some clean up using "select by vertex" mode and pulling around some stray vertices, but this should get you about 95% of the way done without too much trouble. If you want, you can also select edges that you want to spread more (the bottom of the stomach for example) and spread that edge further by itself. |
|
|
Check your work by selecting Texture->Checker->Color in the 3D preview mode. You may want to select Preview->White if your model has the material colors set. Just like Poser, UVMapper Pro multiplies the material color by the texture map color to get the result shown in the preview window. White will temporarily use a default white color for all materials without changing any of the material settings. That's about it. Please let me know if you have anything you'd like to add to this tutorial, comments, etc. by clicking on the "contact me" link below. Good luck! |