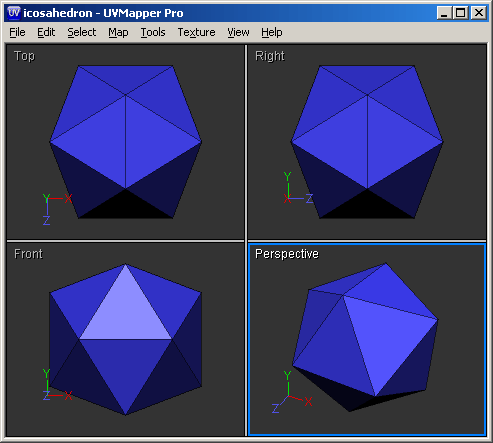
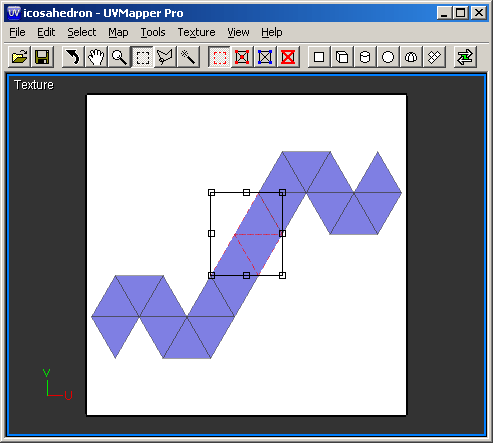
All tools work in both 2D and 3D preview windows, with the exception of the Rotate Tool in the 2D preview , which would be undesirable.
The Rotate Tool allows you to rotate the model in the 3D preview windows. It has no effect in the 2D preview. To rotate the model in the 3D preview window, select the Rotate Tool, left click in the 3D preview window and drag the mouse around. When the Rotate Tool is active, you can access the Hand Tool by pressing the Spacebar or the center button (or mouse wheel) on a three button mouse. Right clicking brings up the Select Popup Menu.
The Hand Tool allows you to grab and move the model in the 3D preview window, as well as the texture map in the 2D preview. To rotate the model in the 3D preview window, select the Hand Tool, left click in any preview window and drag the mouse around. When the Hand Tool is active, you can access the Rotate Tool by pressing the center button (or mouse wheel) on a three button mouse. Right clicking brings up the Zoom Popup Menu.
The Zoom Tool allows you to zoom in and zoom out in both the 2D and 3D preview windows. To change the zoom in any window, select the Zoom Tool, left click in any window and drag the mouse vertically. When the Zoom Tool is active, you can access the Hand Tool by pressing the center button (or mouse wheel) on a three button mouse. Right clicking brings up the Zoom Popup Menu.
The Rectangular Marquee tool allows you to make rectangular selections in both the 2D and 3D preview windows. To make a selection in any window, choose the Rectangular Marquee tool, left click in any window and drag the mouse across the items that you would like to select. To add to the current selection, press and hold the Shift key while dragging the marquee. To remove from the current seleciton, press and hold the Alt key while dragging the marquee. Right clicking brings up the Select Popup Menu. Additionally, which facets get selected in the 3D preview windows depends upon the setting of the Include Backfaces option (see below.)
The Polygonal Lasso tool allows you to make polygonal selections in both the 2D and 3D preview windows. To make a selection in any window, choose the Polygonal Lasso tool, left click in any window to start the polygon, continue clicking to outline the shape of the selection area and double click to close the polygon when done. To add to the current selection, press and hold the Shift key while making the selection. To remove from the current seleciton, press and hold the Alt key while making the selection. Right clicking brings up the Select Popup Menu. Additionally, which facets get selected in the 3D preview windows depends upon the setting of the Include Backfaces option (see below.)
The Magic Wand tool allows you to select edges, verticies, polygons and seams in both the 2D and 3D preview windows. To make a selection, choose the Magic Wand tool, select your preferred selection method, i.e. facet, vertex, edge or seam, and left click on the item you'd like to select. Hold the left mouse button down to select multiple items. Note: when selecting seams, you may left click and release on the first seam and then hold down the shift key to connect all seams between your initial selection and the current selection. Left click again to select the entire path.
Summary
The following table describes how each of the tools operates with different buttons and modifier keys:
|
Active Tool: |
|
|
|
|
|
|
|
with Left Mouse Button gives: |
|
|
|
|
|
|
|
with Ctrl + Left Mouse Button gives: |
|
|
|
|
|
|
|
with Shift + Left Mouse Button gives: |
|
|
|
|
|
|
|
with Alt + Left Mouse Button gives: |
|
|
|
|
|
n/a |
|
with Spacebar + Left Mouse Button gives: |
|
|
|
|
|
|
|
with Center Mouse Button gives: |
|
|
|
n/a |
n/a |
n/a |
|
with Mouse Scroll Wheel gives: |
|
|
|
|
|
|
|
with Right Mouse Button gives: |
Select Popup |
Selection Modes
There are three ways to make a selection; Select by Facet, Select by Vertex, Select by Edge and Select by Seam. Select by Facet allows you to select entire facets at a time. This can be useful for dividing up the texture template because this mode allows you to 'chip off' facets and place them anywhere on the map. The other modes cause the facets to remain connected when moving them. Select by Vertex is very useful for manipulating individual and groups of vertices. Select by Edge is a modification of the Select by Vertex mode that only allows selection of vertices along an edge of the texture map. This mode is useful for pinning down vertices before performing the Relax UVs, Spread UVs and LSCM Mapping features. Select by Seam allows you to select seams that you would like to use to divide up your model for mapping.


 Import an OBJ model
(Ctrl+O)
 Export an OBJ model
(Ctrl+S)
 Select by facet
 Select by vertex
 Select by edge
 Select by seam
 Remap using planar mapping mode
 Remap
using box mapping mode
 Remap using
cylindrical mapping mode
 Remap
using spherical mapping mode
 Remap using polar
mapping mode
 Remap using LSCM mapping mode
 Toggle interactive mapping mode (F2)
